So you’ve bought your first DSLR (digital single-lens reflex) camera — but you don’t really know what to do with your camera. While there are thousands of sites for you to learn how to use your camera, in this section I will tell you all the “must know” DSLR basics, taking your photography skills to the next level.
Note: The terminology might vary, but the concepts remain the same. Just check your manual to see what things are called with your camera.
Camera gear is not all that important
Use the camera you already have. There are countless cameras, lenses, and other accessories on the market today. While some are better suited for a given job, the real takeaway is that pretty much everything today is excellent. The differences are almost always minor, especially at a given price range. Remember, film photographers managed to capture beautiful, iconic photos that still look great today, so why can’t you with a basic DSLR?
The key is your creative skills and knowledge of camera settings. Focus your effort on those, not on collecting camera equipment that will most likely sit in your camera bag. Many people use their phones for most of their photography, and they have no need to buy a separate camera. And you know what? They’re not wrong. For most people out there, a dedicated camera is overkill.

What is photography?
Photography is the art of capturing light (called an exposure) using a camera, usually via a digital sensor or film, to create an image. With the right camera equipment, you can even photograph light that is invisible to the human eye.
The 3 fundamental camera settings
1. Shutter speed
A camera takes a photograph by exposing a digital sensor to light. The shutter is simply a barrier that keeps light out when you’re not taking a photo. By pressing the shutter release, the shutter opens, and while the shutter is open it records an image. When the shutter closes, the camera stops recording. Essentially, it’s how long your camera spends taking an image.
The shutter speed refers to how fast your shutter is opening and closing. The longer it’s open, the more light you’re letting in, and the slower the less light. Shutter speed is responsible for two particular things — changing the brightness of your photo, and creating dramatic effects by either freezing action (fast shutter) or blurring motion (slow shutter).
2. Aperature
The aperture (f-stop) refers to how wide the opening of your lens is. The wider it’s open, the more light you’re letting in. The easiest way to understand it is to think about how your eyes work. As you move between bright and dark environments, the irises in your eyes either expand or shrink, controlling the size of your pupils.
The aperture is measured in”‘f-stops” and is typically displayed using an “f-number,’ e.g., f/2.0, f/2.8, f/4.0, f/5.6, f/8.0, and so on. A larger aperture (a wider opening) has a smaller f-number (e.g. f/2.0) and a smaller aperture (a narrower opening) has a larger f-number (e.g. f/22).

Reducing the aperture by one whole f-stop (f/2.0 to f2/8 or f/5.6 to f/8.0) halves the amount of light entering the camera (alters the exposure of your images by making them brighter or darker). With a wide (larger f/2.0) aperture, your lens blurs the background; with a small (f/22) aperture, your background is more in focus. This is called “depth of field.”
3. ISO
ISO is important because it lets you control the lighting in dark environments. ISO (International Organization for Standardization) refers to how sensitive the sensor of your camera is to light.
The higher your ISO, the brighter your image. It is represented numerically from ISO 100 (low sensitivity) up to ISO 6400 (high sensitivity) and beyond. At “low” sensitivities, more light (daytime) is required to achieve a given exposure compared to high sensitivities where less light (nighttime) is required to achieve the same exposure.
So if you are shooting outside on a bright sunny day where there is a lot of available light that will hit the sensor, an ISO of 100 or 200 would be ideal. This will give you images of the highest quality, with very little grain, also known as noise.
However, if you are shooting in low light conditions, such as inside a dark cathedral or museum, for example, an ISO of 1600 or 3200 may be ideal. However, raising your ISO has consequences. A photo taken at too high of an ISO will show a lot of noise.
The lowest native ISO on your camera is your “base ISO” — usually, this would be ISO 100. This is an important setting, as this will give you the potential to produce the highest image quality by minimizing the noise as much as possible.

Optimally, you should always try to stay as close to the base ISO as possible. However, it is not always possible to do so, especially when working in low-light conditions.
You should start to increase your ISO when there is not enough light for the camera to capture a sharp, bright image. For certain types of sports and action photography, a high ISO may be your only option. While some cameras have extended “HI” and “LO” values for ISO, these are completely simulated and lower your image quality and should be avoided.
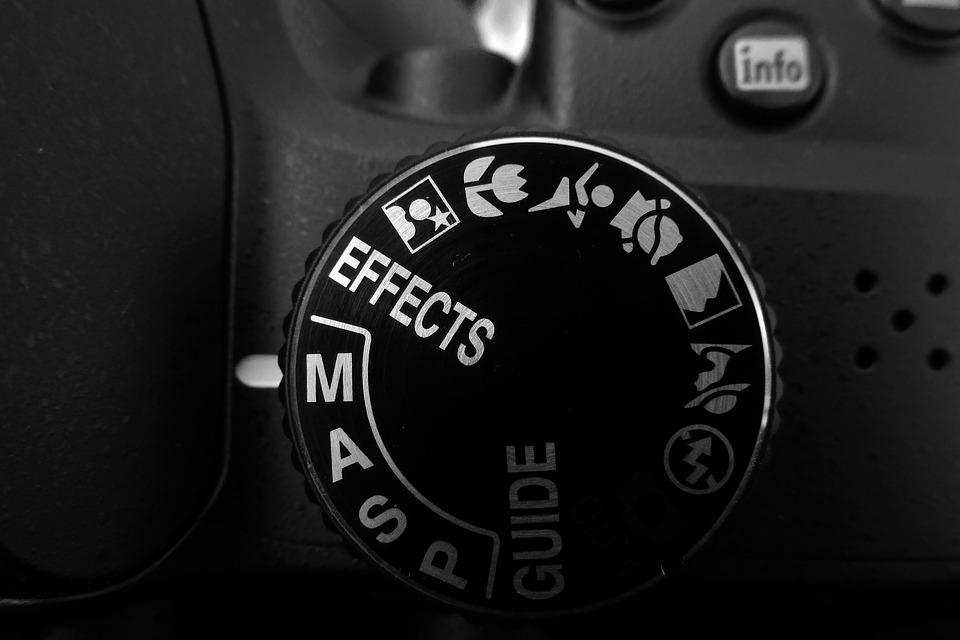
Types of camera modes
You don’t have to shoot in manual mode in order to take more control over your camera. A good way for some people to transition from shooting in full auto to shooting in full manual is to utilize your camera’s semi-automatic modes — aperture priority, shutter priority, and program. Some pros, including myself, don’t shoot in manual mode all the time.

Program (P)
This mode automatically chooses the aperture and the shutter speed for you based on the amount of light that passes through the lens. This mode would be used for “point and shoot” moments, when you are just taking a quick snap picture.
The camera is trying to balance between the aperture and shutter speed, increasing and decreasing the two based on the available light. For example; if the camera is pointed at a bright area, the aperture will automatically increase to a bigger number, while keeping the shutter speed reasonably fast. If you pointed the camera to a darker area, this will decrease the aperture to a lower number to maintain a reasonably fast shutter speed.
To override the camera shutter speed and aperture, you can move the control dial (on Nikon cameras, it is the dial on the back of the camera). Rotate the control dial toward the left, and the camera will decrease the shutter speed while increasing the aperture.
Rotate the dial right, and the camera will increase the shutter speed while decreasing the aperture. So if you were trying to get a faster shutter speed, you would rotate the dial to the right. However, if you were trying to get a large depth of field, you would rotate the dial to the left.
Shutter-Priority Mode (TV or S)
This mode is intended to be used when motion needs to be frozen or intentionally blurred — for example, freezing the movement of your kids running around or blurring the motion of a waterfall.
In “Shutter Priority” mode, you manually set the camera’s shutter speed and the ISO while the camera will automatically pick the right aperture for you, based on the amount of light that passes through the lens, while staying at the shutter speed you set.
If there is too much light, the camera will increase the lens aperture to a higher number, which will decrease the amount of light that is passing through the lens. While if there is not enough light, the camera will decrease the aperture, so more light can pass through the lens.
There is a risk of getting an overexposed or underexposed image, because if the amount of ambient light is not sufficient or if there is too much light and you set the shutter speed to a really high or low number, your exposure will be limited to the aperture of your lens.
Aperture-Priority Mode (A or Av)
This is the mode that gives you full control over the depth of field. This mode is great when the depth of field is the most important thing, like in a portrait.
In “Aperture Priority” mode, you manually set the lens aperture and the ISO, and the camera will automatically pick the right shutter speed. You have full control over subject isolation and you can play with the depth of field.
If there is too much light, the camera will increase the shutter speed, and in a low-light environment, the camera will decrease the shutter speed. There is virtually no risk of having an overexposed or underexposed image.
Manual Mode (M)
As the name suggests, “manual” mode stands for full manual control of the aperture and shutter speed. In this mode, you can manually set both the aperture and the shutter speed to any value you want — the camera lets you fully take over the exposure controls.
This mode is generally used in situations where the camera is having a hard time figuring out the correct exposure under extreme lighting situations. A good example would be if you are out shooting lighting, the camera will incorrectly guess the exposure and either overexpose or underexpose the image.
Manual mode is also valuable for consistency if you need to make sure that both shutter speed and aperture stay the same across multiple exposures. For example, to properly stitch a panorama, all shots need to have the same shutter speed and aperture.
Conclusion
While all of this may seem overwhelming at first, with a bit of practice, you will soon master the basics of your DSLR camera and take awesome shots! Change your settings to see the effect they have, practice as much as you can and be patient — it is important that you enjoy yourself.
Do not be afraid to experiment with modes to understand the relationship with other settings. Once you clearly grasp these other settings, shooting in manual with your DSLR will not feel as overwhelming.

Provided by: The Lightning Guy [Note: Materials may be edited for content and length.]